Mix and match these 16 exercises to eliminate flabby arms forever.
New here? Thanks for stopping by. After you read this post, check out my other blogs for the woman over 50 who wants to lose body fat while building muscle and eating foods you actually want to eat.
Getting Started with Exercises to Eliminate Flabby Arms
Where did these flabby arms come from?
Did you look in the mirror and ask “When did my arms become all saggy?”
Not to worry. We are going to take care of that right now.
Sagging or flabby arms are often a part of aging. Not that our age caused them, but lack of use, loss of muslce mass and an increase in overall body fat are to blame.
Will strength training get rid of flabby arms?
YES! Adding lean muscle will eliminate the appearance of fat on your arms.
Adding muscle also increases your metabolism which means more calories burned.
You can’t spot train to burn fat in your arms. You can do specific exercises to build more muscle in your arms.
What you need to know to eliminate flabby arms
Before I jump into my favorite exercises to eliminate flabby arms and build killer arms, I want to lay some ground rules I follow and I highly encourage you to adopt these too.
Contrary to what you may read on the internet, doing high reps with no weights is NOT going to get rid of your flabby arms.
Rule #1: Overload the muscle
You need to overload the muscle. So, what does that mean? In simple terms, use a weight that feels a little heavy.
The best way to explain this is to pick a dumbbell heavy enough that you can only do 10 reps (with good form). Now, the first time you do this you don’t know what weight to use, right?
So, to find the weight right for you, pick a light weight and keep testing it. For example, pick a weight, like 2 pounds, and aim for 10 reps. Did you make it to 10? Could you do more? If you could do more than 10, you need a heavier weight. If you could only do 8, you can either stick with this weight until you can do 10 or you can try a slightly lighter weight.
Side note: 1 rep equals doing the specific exercise one time (ie. one bicep curl)
Create a consistent workout routine
Although we’d all love to workout once and have toned and flab-free arms, it just doesn’t work like that.
You don’t need hours in the gym. The workout I share below can be done in 15 minutes a day, but you need to be consistent. You can do this 2 – 3 days per week as long as you don’t work your arms two days in a row.
If you haven’t already grabbed it, click the button to get my 3 day per week full body at-home workout that you can do in 15 minutes per day.
Now, “I don’t have time” just became a thing of the past.
Make sure your nutrition is on target
Since a big contributor to our flabby arms is excess fat, we need to make sure we’re following a nutritious meal plan.
Did you notice, I said “meal plan” not DIET?
If you also have a goal to lose weight, you’ll need a calorie deficit. In other words, you need to burn more calories than you consume. For some easy ways to reduce calories, click here.
Although you can’t spot reduce and lose fat specifically in your arms (your body and genetics will decide where the fat comes off first), as you lose body fat overall you will lose body fat in your arms too.
Now, let’s get to those exercises to eliminate flabby arms. The two main muscles that give you the appearance of toned, sexy arms are the biceps and the triceps. Your largest arm muscle is the bicep, which is the muscle at the front of your arm.
The tricep is the muscle at the back of the arm. This is the muscle we usually think of when we talk about flabby arms.
It takes both of these muscles to make the arm look toned. In the rest of this blog, I’ll share exercises for both muscles. The secret is to do BOTH. As you’ll see in the sample workout below, you don’t need to do lots of different exercises to eliminate flabby arms. These are here to give you alternatives so you never get bored.
Bicep exercises to eliminate flabby arms
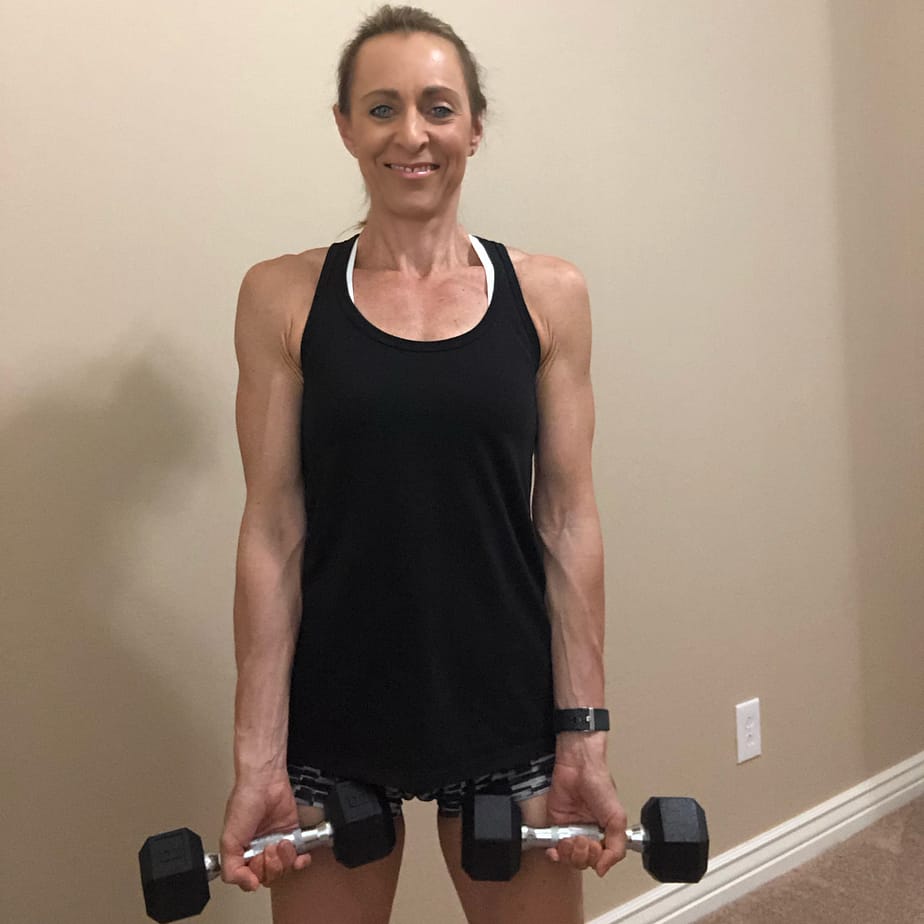
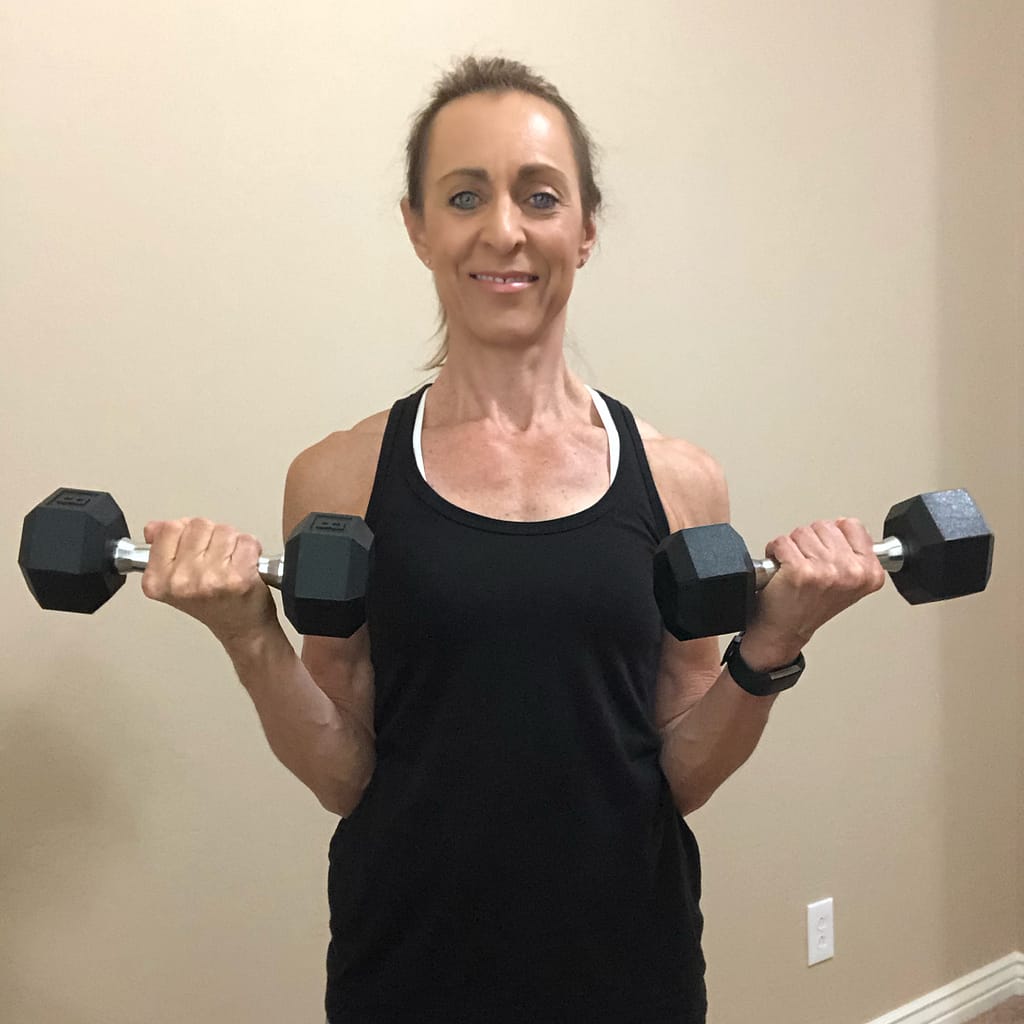
Exercise #1 - Bicep curl
Starting position: Stand tall, shoulders pulled back and arms by your side holding a dumbbell in each hand, palms facing forward away from your body.
The curl: Concentrate on squeezing your bicep muscle as you raise your hands toward your shoulder. Raise both weights simultaneously. Elbows should be squeezing against the side of your body.
Exhale as you curl the weight up and inhale as you lower the weight.

Exercise #2 - Alternating bicep curl
Starting position: Stand tall, shoulders pulled back and arms by your side holding a dumbbell in each hand, palms facing forward away from your body.
The curl: Concentrate on squeezing your bicep muscle as you raise your hands toward your shoulder. Elbows should be squeezing against the side of your body. Lift only one weight at a time. All the way up and down and then alternate arms.
Exhale as you curl the weight up and inhale as you lower the weight.

Exercise #3 - Hammer curl
The hammer curl is done exactly like the bicep curl (#1 above) with the exception that you are starting with arms by your side with palms facing inward toward your body. As you curl the weights up, the tops of the dumbells face up toward the ceiling.


Exercise #4 - Top curl
Similar to the bicep curl except…
Starting position: Stand tall, shoulders pulled back and arms by your side holding a dumbbell in each hand, palms forward facing away from your body.
Concentrate on squeezing your bicep muscle as you raise your hands/dumbbells to waist level. This is your new starting position.

The curl: Raise both weights simultaneously toward your shoulders. Elbows should be squeezing against the side of your body. Now, only lower the dumbbell to waist level. That is one rep.
Exhale as you curl the weight up and inhale as you lower the weight.

Exercise #5 - Bottom curl
Similar to the top curl except…
Starting position: Stand tall, shoulders pulled back and arms by your side holding a dumbbell in each hand, palms facing forward away from your body.
The curl: Concentrate on squeezing your bicep muscle as you raise your hands/dumbbells simultaneously to waist level. Stop. This is your new ending position. Lower the weights back down. Elbows should be squeezing against the side of your body during the entire movement.
Exhale as you curl the weight up and inhale as you lower the weight.
Exercise #6 - Single arm curl with isometric hold
Now, we’re getting a little more fancy.
Starting position: Stand tall, shoulders pulled back and arms by your side holding a dumbbell in each hand, palms facing forward away from your body. Curl one weight up to waist level. Let’s say, we start with your Right Arm. Stop and hold it there.
At this point, your Right Arm is curled to waist level. Your left arm is still fully extended.
Sidenote: Your Right arm is going to want to drift downward. Keep it parallel to the floor as the Left Arm curls.

The curl: Concentrate on squeezing both bicep muscles as you raise your left hand/dumbbell toward your shoulder. Elbows should be squeezing against the side of your body.
Your right arm is not moving. Except, for maybe a little shaking.
Exhale as you curl the weight up and inhale as you lower the weight.

Exercise #7 - Seated dumbell curl
Grab a chair or bench for this one.
Starting position: Sitting tall, shoulders pulled back and arms by your side holding a dumbbell in each hand, palms facing forward away from your body.
The curl: Concentrate on squeezing your bicep muscle as you raise your hands toward your shoulder. Raise both weights simultaneously. Elbows should be squeezing against the side of your body.
Exhale as you curl the weight up and inhale as you lower the weight.


Tricep exercises to eliminate flabby arms
Exercise #8 - Single arm tricep kickback
Starting position: Standing, step one leg forward and bend over slightly, keeping your back flat. You can rest one hand on your front leg. Start with your opposite arm down by your side.
Bend your elbow so that the dumbbell is approximately parallel to the floor with your elbow touching your side and palm of your hand facing in toward the center of your body.
The extension: Pushing your arm/dumbbell back and behind you, squeezing the back of your arm (tricep muscle). Hold at the top for a second, squeezing your tricep (back of arm) and bring it back to starting position.
Side note: The top part of your arm from shoulder to elbow should not move much. The primary movement occurs between your elbow and wrist.


Exercise #9 - Double arm tricep kickback
This is the exact exercise as #8 except…
Extend both arms at the same time. If you’re just starting out, stick with #8 until you’re comfortable with the movement.


Exercise #10 - Single arm overhead tricep extension
Starting position: Standing tall with a dumbbell in one hand, lift your arm toward the ceiling with your elbow close to your ear.
Side note: The first time you do this, do it with no weights to get a feel for the exercise.

The extension: Lower your hand/dumbbell behind your head and down toward the middle of your back.
Side note: Only lower the weight as far as is comfortable, keeping your elbow next to your ear at all times.
TIP: Use your opposite hand to hold your arm close to your head.

Exercise #11 - Two arm overhead tricep extension
Starting position: Standing tall with both hands holding one end of the dumbbell, lift your arms toward the ceiling with your elbows close to your ears.

The extension: Lower the weight behind your head and toward your middle back. Only lower the weight as far as is comfortable and bring the weight back up to starting position.

Exercise #12 - Seated tricep dip
There is a very small range of movement with this one. For a more advanced version, see the chair/bench tricep dip below.
Starting position: Seated on the floor. Knees bent, feet on the floor. Hands on the floor by your sides. Squeeze the back of your arm as you extend your arms and raise your butt off the floor.
The dip: Bending your elbows lower your butt toward the floor. Squeeze your tricep (back of arm) as you extend and lower.
NOTE: Find the hand position that feels best to you. Some women have wrist issues so if this bothers your wrist, skip it and do a different tricip exercise.
I know it’s difficult to see from these photos. My butt is only an inch or two off the floor in the far right photo. As I said, there is a very small range of motion invovled.


Exercise #13 - Chair/bench tricep dip
This is more advanced. If you’re new to tricep dips, start with the seated tricep dip above.
Starting position: Sit on the edge of a sturdy chair or bench. Hands on the bench close to your sides (even under your butt).
With feet planted on the floor and legs extended in front of you, move your body forward off the bench.

The dip: Keeping your body as close to the bench as you can, lower your body toward the floor as far as is comfortable (think of it as nearly scraping your back against the bench) and then back up.
Elbows should be scraping the sides of your body as you start to lower and then they are pointed straight to the back of the room (not out to the side) as you lower.

Exercise #14 - Tricep knee pushups
Did you see the word “PUSHUP” and already decide that’s not for you?
If so, I ask you to reconsider. Pushups are HARD, true. But, they are one the best exercises to eliminate flabby arms. You’ll also gain a new physical strength, and mental toughness and holy crap, an amazing sense of accomplishment.
AND, I’m going to give you some variations. You’ll be doing #15 before you know it!
You want to gain confidence? Do pushups. Most women can’t do them (only because they don’t try). You will have earned bragging rights if you do these.
OK, enough about that. Time to get to work.
Starting position: Hands on the floor. With knees all the way to your toes on the floor, lean your body forward so that your chest is above your hands.
Side note: The more narrow your hands (ie. the closer they are to each other), the harder it will be SO… start with them a little wider and bring them in as you get stronger.
A wider hand position will target more of the chest instead of the triceps, but that’s ok. Do what you can do.

The Push up: Lower your body toward the floor, arms should be scraping the sides of your body with elbows pointing to the back of the room.
Extend back up to starting position.

Exercise #15 - Tricep full pushups
If you’re doing the full pushups on your toes, give yourself a pat on the back. This is NOT a beginner exercise.
Once you feel you have conquered the tricep pushup on your knees, you’re ready to start adding in some full pushups.
When starting out, mix these in with #14. Do as many of these on your toes as you can (maybe 1 or 2), then drop to your knees to finish.
The only difference with the full (on your toes) version is that YOU ARE ON YOUR TOES instead of your knees.


Exercise #16 - Lying tricep extension
This is a phenomenal exercise and a more advance one. You can build amazing arms without this one, but if you’re ready to try it, let’s go.
Starting position: Lying on the floor on your right side. Right arm reaches up and holds onto your left shoulder.
Left hand is on the floor near your right arm pit.
Legs are extended and can bend as is comfortable.

The extension: Press your body upward with your left hand. Then lower back to the floor.
Sidenote: Try not to rest on the floor. Just briefly tap down and right back up.

Pulling it all together with exercises to eliminate flabby arms
You can use these 16 exercises to change up your workout as you see fit. Or pick the one’s you like best and stick with those. Just make sure to include a mixture of bicep and tricip exercises.
Try this for a great 15 minute arm workout:
Do 10 reps of each of these exercises. Then repeat 2 – 3 times.
- Bicep curl
- Hammer curl
- Single arm tricep curl
- Single arm overhead extension
Although this blog focused on our arms, you won’t want to neglect the rest of your body.
If you haven’t already, don’t forget to grab my 3 day full body at-home workout that you can also do in 15 minutes a day.
Pin it now. Read later.
